
7 Tips for Choosing Concrete Repair Materials?

Concrete repair rarely fails because workers lack enthusiasm. It often fails because the material does not match the damage, environment, or repair method. Choosing suitable concrete repair materials requires more than comparing prices on a product label. It demands a clear diagnosis of cracking, delamination, corrosion, moisture, loading, and substrate strength.

The scale of the issue is substantial. The Federal Highway Administration’s 2023 National Bridge Inventory reported 623,218 bridges in the United States. About 42% were at least 50 years old. That aging network increases demand for durable, compatible repair systems. FHWA guidance emphasizes sound substrate preparation, moisture control, curing, and traffic suitability. ACI 546R, Concrete Repair Guide, also stresses evaluation before material selection. These recommendations support a practical principle: repair the cause, not only the visible crack.

This guide presents seven tips for selecting concrete repair materials with greater confidence. It examines cementitious mortars, polymer-modified products, epoxy systems, corrosion-control materials, and rapid-setting compounds. Each option behaves differently under temperature changes, water exposure, chemical attack, and structural movement. Product data matters. So does field experience. A material may perform well in a laboratory and disappoint beside a wet loading dock.

Measure twice.

Review technical data sheets, safety information, bond strength, shrinkage, permeability, curing needs, and service temperature. Check compatibility with the existing concrete and reinforcement. The right choice may not be the cheapest one. Sometimes, the most honest conclusion is that further testing or engineering review is necessary. That pause can prevent a larger repair later.

7 Tips for Choosing Concrete Repair Materials?

Assess Damage Depth and Surface Profile Using ICRI CSP 3–5

Choosing Concrete Repair Materials: Assess Damage Depth and Surface Profile Using ICRI CSP 3–5

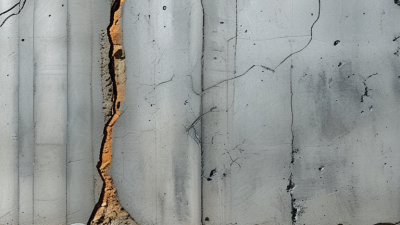
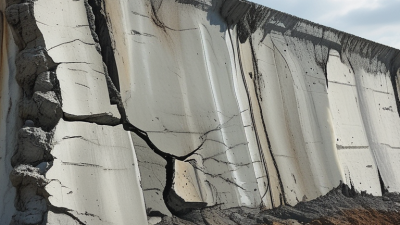
Repair material selection should begin with evidence, not appearance. Tap the concrete with a hammer and mark hollow-sounding areas. Expose the damaged zone carefully, then measure its deepest point. A shallow surface defect needs different material than a repair reaching reinforcement. Check whether steel is corroded, damp, or contaminated before specifying anything.

Use the ICRI Concrete Surface Profile guide to evaluate preparation. CSP 3 usually indicates a medium texture, while CSP 4 and CSP 5 provide progressively rougher surfaces. Compare the prepared concrete with the intended material’s technical requirements. A thin repair mortar may not suit a deep cavity or an aggressive CSP 5 profile. The profile must support mechanical bonding without leaving fragile ridges or loose dust.

Seven practical checks can reduce mistakes: confirm repair depth, inspect reinforcement, measure moisture, identify cracks, verify surface cleanliness, match curing conditions, and review compatibility. Remove laitance and weak concrete until sound material remains. A pull-off test can provide useful evidence when bond performance matters. Do not rely on visual roughness alone.

I have seen repairs fail because the surface looked rough enough, but powder remained in the pores. That small oversight changed everything. Material data sheets also need careful reading; working time, shrinkage, and application thickness matter on site. When damage suggests structural movement, obtain an engineer’s assessment before selecting a repair system. Sometimes the correct decision is to investigate longer.

Match Repair Strength and Modulus to the Existing Concrete

Choosing concrete repair material starts with the existing concrete, not the product label. FHWA’s 2024 National Bridge Inventory reports that about 42% of U.S. bridges are at least 50 years old, while roughly 6.8% are rated in poor condition. Many repairs therefore connect new material to concrete with unknown history, moisture, and stiffness.

Match compressive strength, but do not chase the highest number. A repair mortar that is much stronger than the substrate can shift stress into the bond line. Its elastic modulus, shrinkage, thermal movement, and tensile behavior also matter. ACI 562-19 emphasizes compatibility during repair design. ASTM C469 testing can help estimate the existing concrete’s modulus, while core testing gives more reliable evidence than surface rebound readings alone. Rebound numbers can mislead. I have seen sound-looking surfaces hide weak, carbonated concrete beneath them.

Review the repair area at several depths. Record cracking, delamination, moisture, and reinforcement corrosion before selecting materials. For thin patches, a low-shrinkage material with a compatible modulus may perform better than a stronger, stiffer mix. For structural repairs, involve a qualified engineer and verify load transfer assumptions. FHWA repair guidance also stresses proper substrate preparation and curing, because poor curing can erase laboratory advantages. One practical mistake is using a single test result for an entire structure. Concrete varies. Match the repair to the weakest credible zone, then question that decision when field conditions change.

Select ASTM C928 Mortars for Rapid, Freeze–Thaw-Resistant Repairs

7 Tips for Choosing Concrete Repair Materials?

Selecting the right repair mortar starts with exposure, not convenience. ASTM C928 materials are designed for rapid-hardening concrete repairs. They help reopen surfaces sooner. This matters on bridge decks, loading bays, and cold-weather walkways. FHWA’s 2023 National Bridge Inventory reported more than 40,000 U.S. bridges in poor condition. Many repairs face traffic, moisture, and repeated temperature changes. A fast cure alone is not enough.

Tip 1: Confirm the ASTM C928 classification and required strength. Then request test results from the actual mix. Check working time, bond strength, shrinkage, and finishing behavior. I prefer field mock-ups beside the damaged edge. The repair should not crumble under a steel trowel. Small details matter.

Tip 2: Treat freeze–thaw resistance as a separate question. ASTM C928 compliance does not automatically prove long-term freeze–thaw durability. Ask for ASTM C666 testing or equivalent documented evidence. The American Concrete Institute identifies water penetration, saturation, and freezing cycles as key durability concerns. Keep the repair area clean and properly dampened. Poor preparation can defeat a good mortar.

Tip 3: Match the material to the repair depth and temperature. Rapid-setting mortars can lose workability quickly on hot afternoons. In winter, cold substrates may slow strength development. Read the technical data carefully. I have seen crews choose speed, then regret the shortened finishing window. No material replaces disciplined curing, joint detailing, and inspection.

ASTM C928 Rapid-Repair Mortar: Minimum Compressive Strength Benchmarks

ASTM C928/C928M specifies minimum compressive-strength benchmarks for packaged, dry, rapid-hardening cementitious repair materials. The required strength increases from 300 psi at 3 hours to 5,000 psi at 28 days, supporting faster return-to-service planning. Freeze-thaw durability should be confirmed separately using the project specification and the applicable test methods.

Reference: ASTM C928/C928M minimum compressive-strength requirements.

Use ASTM C881 Epoxies for Bonding and Structural Crack Injection

7 Tips for Choosing Concrete Repair Materials

Use ASTM C881 Epoxies for Bonding and Structural Crack Injection

Choosing concrete repair materials requires more than comparing labels. ASTM C881 epoxies are useful for bonding hardened concrete and injecting stable structural cracks. I check the required Type and Grade before selecting a product. The technical data should show bond strength, viscosity, cure time, and temperature limits. Numbers matter.

The concrete surface must be sound, clean, and free from dust, oil, and weak laitance. Remove loose particles with mechanical preparation, then vacuum the crack carefully. Moisture needs attention. Some systems tolerate damp concrete, while others require a dry surface. I have seen strong epoxy fail because preparation was rushed. That was an avoidable mistake.

For crack injection, install ports along the crack and seal the surface between them. Inject from the lowest port upward using controlled pressure. A low-viscosity ASTM C881 epoxy can penetrate narrow cracks, but pressure should never replace inspection. Moving cracks, active leaks, or corrosion-related damage may require a different repair strategy. Confirm the crack’s cause before filling it. ASTM C881 compliance alone does not prove injection suitability. Review the manufacturer’s test data, storage conditions, and field limitations. Record the concrete temperature and batch details during installation. I once ignored a cold slab and underestimated cure time. The repair looked acceptable, but testing later showed weak development. Repair decisions deserve that level of honesty.

Verify Bond, Shrinkage, and Durability with ASTM C1583 and C666

A repair material can look sound while hiding a weak interface. FHWA’s 2023 National Bridge Inventory lists about 624,000 U.S. bridges, with roughly 42% at least 50 years old. Aging structures need measured performance, not attractive packaging.

Tip 1: Check ASTM C1583 bond strength, not only compressive strength. The pull-off test reveals tensile capacity and failure location.

Tip 2: Record whether failure occurs in the repair, substrate, or interface. That detail often matters more than the final number.

Tip 3: Compare results with the engineer’s specified acceptance value. ASTM C1583 does not provide one universal pass-fail limit.

Tip 4: Use ASTM C666 to examine freeze-thaw resistance when water and cold cycles are expected. The method tracks relative dynamic modulus and durability factor through repeated cycles.

Tip 5: Confirm the test procedure, curing age, and number of cycles. Small changes can distort comparisons.

Tip 6: Review shrinkage data under restrained conditions, preferably with project-specific testing. Low shrinkage sounds helpful, but restraint, temperature, and moisture still control cracking.

Tip 7: Inspect the substrate before testing. Dust, weak laitance, or saturated pores can reduce bond dramatically.

Field experience adds a warning. I have seen excellent laboratory results fail on damp, poorly prepared concrete. ASTM results guide decisions; they do not replace surface preparation, curing control, or site verification. Some test programs also overlook thermal movement. That omission deserves a second look.

Find the Right Repair Product for Your Project

Need to find the most appropriate product for the needs of your project? We can help because we have over 70 years of experience servicing the industry with every kind of project, from Do-it-yourself projects to large skyscrapers. Package Pavement has the experience, the knowledge and the products to help every project succeed.

Quikrete Repair Products
Legend
Package Pavement has two convenient locations in Stormville, NY (Dutchess County) and Ravena, NY (Greene County) to serve the Northeastern Region with bagged concrete, blacktop, mortar, and repair products. This map gives a general idea of where we service and the product lines we offer.
Package Pavement Products
Quikrete Products
Spec Mix Products
map

Our Brands Websites