How to Choose the Best Concrete Repair Materials?
Choosing the right concrete repair materials begins with understanding the damage, not simply covering it. A hairline crack, a spalled beam edge, and a leaking construction joint require different solutions. Moisture, chloride exposure, freeze-thaw cycles, loading, and poor original detailing can all change the repair strategy. The surface tells only part of the story.
Peter H. Emmons, a recognized concrete repair specialist and author of Concrete Repair and Maintenance Illustrated, offers a practical principle: “Repair materials must be selected for the cause of damage, not merely its appearance.” That idea remains important on real projects. A polymer-modified mortar may suit shallow surface repairs, while epoxy injection may address a structural crack. Neither product is automatically best. Compatibility matters. Bond strength matters. So does movement.
This guide explains how to compare concrete repair materials by performance, application conditions, and expected service life. It considers substrate moisture, repair depth, curing time, thermal movement, and exposure conditions. You will also see why preparation often determines success more than the product label. A clean, sound substrate is essential.
There is no perfect material.
Even experienced contractors can make poor choices when diagnosis is rushed. Product data sheets may look convincing, yet field conditions can differ sharply. A repair exposed to standing water needs different planning from one inside a dry warehouse. The selection process should therefore combine manufacturer guidance, project records, visual inspection, and qualified engineering judgment. Practical testing may reveal weaknesses before failure becomes expensive.
Assess the Type and Cause of the Concrete Damage
Choosing the best concrete repair material starts with understanding the damage.
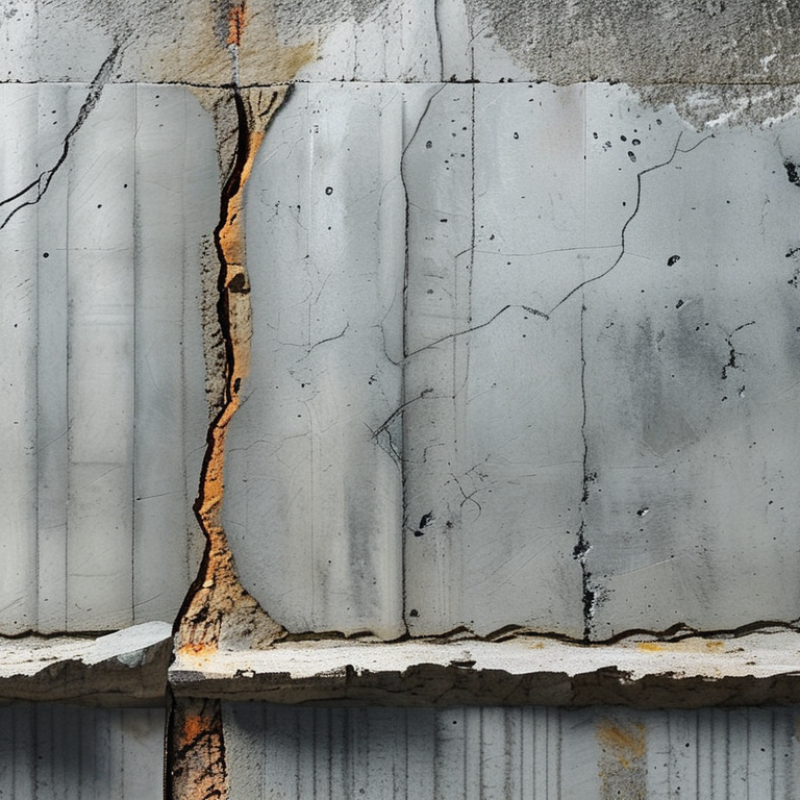
A narrow, stable crack needs a different solution from a deep, moving crack. Clean the surface and record each defect before selecting a product. Measure crack width, depth, length, and moisture. A simple sketch can reveal patterns that casual inspection misses.
Look for the cause, not only the visible symptom.
Rusting reinforcement may create long cracks and loose concrete along an edge. Water intrusion often leaves dark stains, white deposits, or damp patches. Freeze-thaw damage can produce shallow scaling across exposed surfaces. Heavy loads, poor curing, abrasion, and chemical exposure create different repair needs. Tap the area with a small hammer. A hollow sound may indicate hidden delamination. Do not ignore it.
I have sometimes focused too quickly on the crack itself.
That approach can waste material and hide a larger problem. Remove weak concrete until the remaining surface feels solid. Check whether reinforcement is corroded, then assess the surrounding concrete. For structural damage, an experienced engineer should review the location and loading conditions. Material selection should match movement, depth, exposure, and curing time. A rigid repair may fail when the substrate keeps moving. A surface patch may look clean but cannot replace missing structural capacity. Weather matters too. Cold, heat, and standing water can change the repair result. Testing a small area first is sensible, although it does not replace proper assessment.
Define the Repair Requirements and Site Conditions
Choosing concrete repair materials starts with defining the damage, not browsing product labels.
Measure crack width, repair depth, affected area, and concrete soundness. A hairline shrinkage crack needs a different approach from a delaminated beam edge. Tap the surface with a hammer. Hollow sounds may reveal hidden separation. I have seen repairs fail because visible damage was treated while damp, weakened concrete remained underneath. The first decision should be structural or cosmetic.
Record site conditions before selecting a mortar, grout, or resin.
Note surface moisture, temperature, rain exposure, sunlight, and ventilation. Check whether water is entering through the crack. Active leaks can defeat otherwise suitable materials. Consider traffic, vibration, chemical contact, and the time available for curing. A warehouse floor may need rapid reopening, while a bridge repair may require longer strength development. Do not assume a dry-looking surface is actually dry. A simple moisture check can prevent an expensive mistake.
Match the material’s strength, shrinkage, bond, and movement capacity to the existing concrete.
A repair that is much stiffer may transfer stress into nearby areas. Confirm preparation, mixing, placement, and curing requirements from technical data and project specifications. Small trial patches are useful, especially on old or contaminated concrete. Ask a qualified engineer to review load-bearing repairs or uncertain cracks. I still question rushed selections based on appearance alone. Good documentation helps: photograph each defect, record measurements, and note weather conditions during application.
Compare Concrete Repair Material Options
Choosing concrete repair materials starts with the damage, not the product label. A hairline crack needs a different response from a spalled beam. Inspect moisture, crack movement, depth, and exposure before comparing options. For dry, stable cracks, low-viscosity epoxy can restore continuity and limit water entry. It is strong. Yet it may fail when cracks keep moving.
Polymer-modified repair mortar suits chipped corners, shallow surface loss, and vertical patching. It bonds well when the substrate is clean, sound, and properly dampened. For deep voids, non-shrink grout or flowable repair concrete can fill confined spaces with less settlement. Fast-setting cement helps when downtime matters, but its short working time punishes poor preparation. I have seen good materials fail because dust remained inside the repair cavity. That detail is easy to miss.
For outdoor slabs, compare freeze-thaw resistance, permeability, shrinkage control, and curing demands. Around reinforcing steel, select a material compatible with steel protection and required concrete cover. Read technical data, then verify it against site conditions and local standards. A stronger material is not automatically better. A rigid patch beside flexible concrete may create a new edge crack. Trial patches can reveal color, workability, and bonding problems before full placement. I would not skip them, even on a small repair.
Select Materials Based on Performance and Compatibility
How to Choose the Best Concrete Repair Materials?
Select Materials Based on Performance and Compatibility
Concrete repair materials should match the damage, substrate, and surrounding environment. A strong product is not automatically the right choice.
On a bridge deck, I check moisture, chloride exposure, crack movement, and repair depth before selecting a mortar. For shallow surface damage, a polymer-modified repair mortar may provide suitable adhesion and shrinkage control. Deeper repairs need materials designed for low heat buildup and stable placement. Otherwise, the patch can crack beside the original defect.
Compatibility matters as much as strength. The repair material should have similar thermal expansion, stiffness, and permeability to the existing concrete. A very rigid patch may resist loading but transfer stress to weaker edges. That mistake is easy to miss.
Test the substrate first.
Remove dust, loose concrete, oil, and weak laitance. Check whether the prepared surface is sound and properly dampened. Excess water can weaken the bond, while a dry surface may draw water from the repair material too quickly. Follow the technical data, but do not treat it as a substitute for site judgment.
I have seen repairs fail because curing was rushed. Wind, direct sunlight, and low humidity can remove moisture within minutes. Protect the area and inspect the edges during curing. Not every failure comes from poor material selection. Sometimes, the preparation was the real problem. A small trial repair can reveal bonding or shrinkage issues before the full application begins.
Plan the Application, Curing, and Quality Inspection
How to Choose the Best Concrete Repair Materials?
Concrete repair begins with a cause, not a product. ASCE’s 2021 Infrastructure Report Card states that 42% of U.S. bridges are at least 50 years old, while 7.5% are structurally deficient. That age increases exposure to cracking, chloride ingress, freeze-thaw cycles, and corrosion. Inspect the substrate first. Record crack width, moisture, temperature, soundness, and reinforcement condition. ACI 562 and ICRI 310.2R support selecting materials according to the damage mechanism, exposure, and required service life.
Plan the application in measurable steps. Remove weak concrete until the substrate is sound, then clean exposed steel without reducing its section. Use a test area to confirm bond, color, texture, and finishing time. The repair material should match the existing concrete’s strength, movement, and thermal behavior. Higher strength is not always better. It can increase restraint cracking. That detail is often missed.
Curing needs its own written plan. Follow the material’s specified water, temperature, thickness, and protection limits. ACI 308R notes that curing controls moisture loss and supports strength development. Protect fresh repairs from wind, direct sun, vibration, and rapid temperature changes. Inspect before placement, during batching, and after curing. Check repair depth, surface profile, voids, cracks, bond, and curing records. Pull-off tests can support acceptance, but one test cannot represent every location. Field judgment still matters. The plan may need revision.