How to Choose the Right Garden Shed for Your Needs?
Choosing the right Garden Shed starts with an honest look at your space, routines, and budget. A shed should fit the garden without swallowing it. Picture the route from your back door: muddy boots, a wheelbarrow, and the tools you reach for every weekend. Measure that path, not just the proposed shed footprint.
For transparency, the quoted adviser below is a fictional composite, not a real person or sourced interview. Garden Shed adviser “Maya Ellis” offers this planning principle: “Choose for what you store, how you move, and the weather your garden actually gets.” It is a useful test, though no single rule fits every yard.
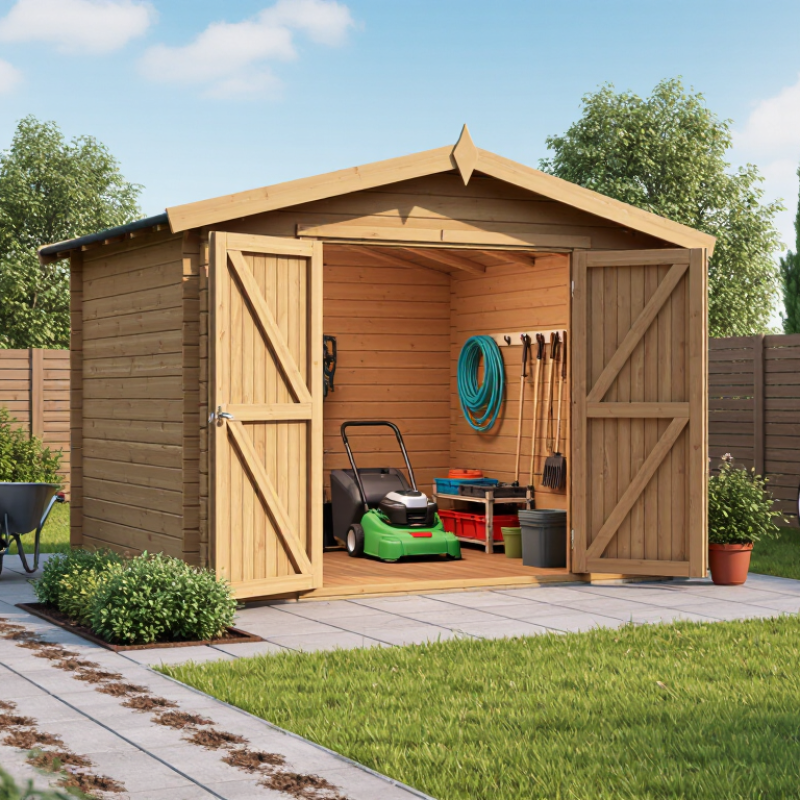
Think about what the shed must protect. A mower needs a wider doorway than a box of hand tools. Timber can blend with planting, but it needs care; metal can be practical, yet condensation may matter. Plastic is easy to maintain, though size and appearance still deserve a close look. Check the base, ventilation, roof design, and door swing before comparing prices.
Small details matter. Measure twice. Leave room to open doors and carry bulky items inside. Then consider whether your needs may change: bicycles, seed trays, or a growing collection of garden tools can quickly claim spare space. A slightly larger shed may be sensible, but only if it remains proportionate to the garden.
The sections ahead compare materials, sizes, foundations, security, and costs. Use them to weigh real trade-offs, not chase a perfect answer. Sometimes, the best choice is simply the one you will keep organized.
Assessing Your Storage and Workspace Needs
Before comparing shed sizes, list what must live inside: a mower, hand tools, seasonal chairs, potting supplies, or bicycles. Measure the largest item and note its handle and door clearance. A mower may fit on paper but still fail to turn through a narrow doorway. Start with use. If you need a potting bench, include standing and elbow room, plus space for soil bags and a watering can. Keep frequently used items near the entrance; otherwise, daily access becomes awkward.
Consider what needs to happen inside, not just what needs to be stored. For repairs or other hands-on work, check whether the floor can support your equipment and whether lighting and ventilation are adequate. Leave room. Check the site dimensions too: roof overhangs, fences, and tree branches can restrict placement or door movement. A simple sketch with measurements can reveal conflicts early. Door clearance is easy to overlook, even on a careful sketch, so check it again. It is easy to underestimate future gear, but extra space without a clear purpose can use up garden area unnecessarily. Revisit your list after a week of normal use.
Measuring the Site and Checking Local Requirements
Before choosing a garden shed, measure the usable site, not just the open patch of lawn. Mark the corners with stakes and measure the length and width at ground level. Then check the space above: low branches, roof overhangs, fences, and gates can limit delivery or access. Leave room to open the door and walk around the shed for repairs. A narrow path may look fine on paper but feel awkward with a wheelbarrow. Measure twice. Slightly uneven ground can also make a planned fit misleading.
Tips: Check local planning rules, permit requirements, property-line setbacks, and any homeowners’ association guidelines before ordering. Rules vary by location and may depend on shed size, height, foundation, or intended use. Ask the relevant local office for current requirements, and keep a written record of its guidance.
Look for buried utility lines before digging or installing anchors, using your area’s utility-location service where available. Also notice where rainwater flows after a storm. A shed placed in a low spot may collect dampness, even if the ground seems dry on a sunny day. Check the proposed position after rainfall if you can. Small details matter. Recheck your measurements against the shed’s actual exterior dimensions, including trim and roof edges; product dimensions may describe the floor area instead.
How to Choose the Right Garden Shed for Your Needs? – Measuring the Site and Checking Local Requirements | Typical Use | Example Shed Footprint (W × D) | Footprint Area | Suggested Planning Envelope* | Site Measurement to Check |
| Small tools and a few garden supplies | 1.8 × 1.2 m (5.9 × 3.9 ft) | 2.16 m² (23.3 sq ft) | 3.0 × 2.4 m (9.8 × 7.9 ft) | Check the narrowest clear width, including the planned access route. |
| Hand tools, potting supplies, and a push mower | 2.4 × 1.8 m (7.9 × 5.9 ft) | 4.32 m² (46.5 sq ft) | 3.6 × 3.0 m (11.8 × 9.8 ft) | Measure gate openings and turns to confirm equipment can reach the shed. |
| Bikes, a mower, and general storage | 3.0 × 2.4 m (9.8 × 7.9 ft) | 7.20 m² (77.5 sq ft) | 4.2 × 3.6 m (13.8 × 11.8 ft) | Mark the proposed footprint and door swing on the ground before choosing a position. |
| A workbench plus larger garden equipment | 3.6 × 2.4 m (11.8 × 7.9 ft) | 8.64 m² (93.0 sq ft) | 4.8 × 3.6 m (15.7 × 11.8 ft) | Check that the site leaves room to open doors and move items safely. |
| Workshop or substantial seasonal storage | 4.8 × 3.0 m (15.7 × 9.8 ft) | 14.40 m² (155.0 sq ft) | 6.0 × 4.2 m (19.7 × 13.8 ft) | Confirm the usable area after accounting for boundaries, trees, drains, and utilities. |
*Planning envelope adds an illustrative 0.6 m (about 2 ft) around each side of the shed for access and maintenance. It is a planning allowance, not a legal setback or a universal requirement. The stated footprint is the ground area calculated from the example dimensions; actual products may have different external dimensions.
Local Requirements and On-Site Checks | Check | What to Verify | Practical Action |
| Planning permission or zoning rules | Whether the shed’s size, height, location, or intended use requires approval in your area. | Check with your local planning authority before purchasing or building; rules vary by location. |
| Building regulations or permits | Whether the structure, foundation, electrical work, or other features trigger additional requirements. | Ask the relevant building department which rules apply to your proposed design and use. |
| Boundary distance and easements | Required distance from property lines, shared access ways, easements, or other restricted areas. | Check local rules and property documents; measure from the boundary rather than estimating. |
| Underground and overhead services | Buried cables or pipes, overhead wires, drainage routes, and access points that must remain clear. | Locate services before digging or installing anchors, posts, or a foundation. |
| Ground, drainage, and access | A stable, reasonably level base; water flow; and a route wide enough for delivery and future use. | Measure the site at ground level and check it after rain for pooling or runoff issues. |
| Property or community restrictions | Lease terms, deed restrictions, or homeowners’ association rules that may apply in addition to local regulations. | Review applicable documents and obtain any required written approval before work begins. |
Comparing Shed Materials and Construction Types
Timber sheds are easy to customize, and their solid walls suit shelves or hooks. They need regular checks for damp, peeling paint, and insect damage. Metal sheds usually need less routine care, but thin panels can dent and may feel hot inside on sunny afternoons. Resin resists rot and is simple to wash. However, its panels may flex under heavy loads, so check the stated capacity before storing tools. That matters.
Construction type affects stability as much as material. Framed sheds use a supporting structure beneath their walls, which can help when you want to add shelving. Panel-built kits are often quicker to assemble, but their joints and fixings deserve close attention. Poorly aligned panels can let rain in. Larger sheds may arrive in sections; measure gates and access paths before delivery. I would not choose by advertised floor area alone—the roof slope and door opening can make usable space feel smaller.
Tips: Set the shed on a level, well-drained base, and leave room to open the door fully. Check ventilation, roof overhang, and replacement-part availability. If you live in a windy area, ask how the shed anchors to its base; the answer may change which construction type makes sense.
Choosing the Right Size, Layout, and Features
Measure the items you plan to store before choosing a shed size. A mower, two bicycles, and a workbench need more room than their footprints suggest. Leave space to walk around them and open doors without shifting everything. A simple sketch with measurements can prevent an expensive mismatch. Small sheds fill quickly.
Think about how you will move through the space. Put frequently used tools near the entrance, and keep a clear path to larger equipment. Shelves make use of wall height, but deep shelves can hide small items at the back. A wide door helps with bulky gear; a window can bring in daylight, though it may reduce usable wall space.
Choose features for your actual routine and local conditions. Check that the floor can support heavy equipment, and consider ventilation if damp tools or garden materials will be stored inside. A ramp may help move a mower, but it needs room outside the doorway. It is easy to overplan. Even a careful layout may feel cramped once seasonal items appear, so leave some flexible space rather than filling every corner.
How to Choose the Right Garden Shed for Your Needs
Compare example shed footprints to see how quickly usable floor area grows with size.
How to use this chart: Floor area is calculated from the example length and width. A 6 × 4 ft shed offers 24 sq ft; a 12 × 10 ft shed offers 120 sq ft. Choose a footprint that fits your stored items, planned layout, and available site space.
Evaluating Costs, Installation, and Maintenance
Start with the full installed cost, not the advertised shed price. Angi’s shed cost guide estimates many projects at roughly $1,500–$10,000, with size, materials, and site preparation affecting the total. A small resin shed on level gravel may cost far less than a framed workshop on a concrete slab. Regional prices vary, so use that range for planning, not as a quote. Easy to overlook.
Before installation, measure the route from the street to the site, including gates and low branches. Ask whether the estimate includes delivery, leveling, anchoring, and the base. A shed that arrives easily may still need extra ground preparation. That can sting.
Maintenance depends on material and exposure. The USDA Forest Products Laboratory’s 2021 Wood Handbook explains that decay fungi need sufficient moisture; wood moisture content around 20% or higher can create favorable conditions. Keep wooden siding clear of soil, check roof edges after heavy rain, and repair peeling finish before water reaches bare wood. Metal avoids repainting, but scratched coatings can rust; resin needs less coating care, though its doors and panels still need inspection. I’d compare upkeep over several years, not just the purchase price. Estimates can miss small repairs.
